
How to Connect AI to WordPress: A Beginner’s Guide
Quick summary
- Choose one task first: reading posts and saving a draft make a useful starting point.
- Use a compatible connector: the AI app needs a supported way to reach your WordPress site.
- Check the available tools: connecting a site does not unlock every WordPress feature.
- Start with limited access: give the connection only the permissions your task needs.
- Test before publishing: open the saved draft in WordPress and review it yourself.
Do you write content with AI, then copy it into WordPress by hand? You can connect AI to WordPress so a compatible assistant can help with tasks such as reading posts or saving drafts.
This guide explains the setup choices and a practical first test. The exact screens depend on your AI app and connector. It is a setup checklist, not a claim that every plugin offers the same features.
What does it mean to connect AI to WordPress?
A connection gives an AI app access to selected actions on your site. For example, a connector might offer tools to:
- Find existing posts and suggest relevant internal links.
- Create a new draft from an approved outline.
- Assign categories that already exist on the site.
- Upload an image or update SEO fields, when those features are supported.
A visitor chatbot is a different use case. It answers questions on your website. A content connector helps you manage the site from an AI app. Decide which job you want before choosing a tool.
If the terms are new, start with our simple guide to MCP, WordPress and business tools. It explains how MCP, APIs and automation fit together.
Before you connect AI to WordPress
Prepare these basics:
- A clear goal: for example, create one test draft without publishing it.
- WordPress access: permission to install a plugin if your chosen method requires one.
- A compatible AI app: check whether it supports the connector and its sign-in method.
- A backup or staging site: a staging site is a separate copy where you can test changes.
- A feature list: confirm support for drafts, images and SEO fields before you depend on them.
Check your hosting plan and plugin requirements too. Some managed services limit plugin installation or external connections. Avoid assuming that instructions for one WordPress service apply to every host.
Choose how to connect AI to WordPress
| Method | Useful when | What to check |
|---|---|---|
| Ready-made connector | You want supported WordPress tools inside your AI app. | Available actions, supported apps, permissions and cost. |
| AI plugin inside WordPress | You want writing help in the WordPress dashboard. | Whether it only writes text or can also manage content. |
| MCP Adapter with suitable abilities | You or a developer want to expose specific WordPress actions through MCP. | Required abilities, client setup and authentication. |
| API-based automation | You have a defined task that should follow the same steps each time. | Triggers, API access, error handling and review steps. |
For a first draft workflow, choose a tool that already supports creating drafts. This avoids needing to build that action yourself. The steps below assume you have selected such a connector.
Six steps to connect AI to WordPress
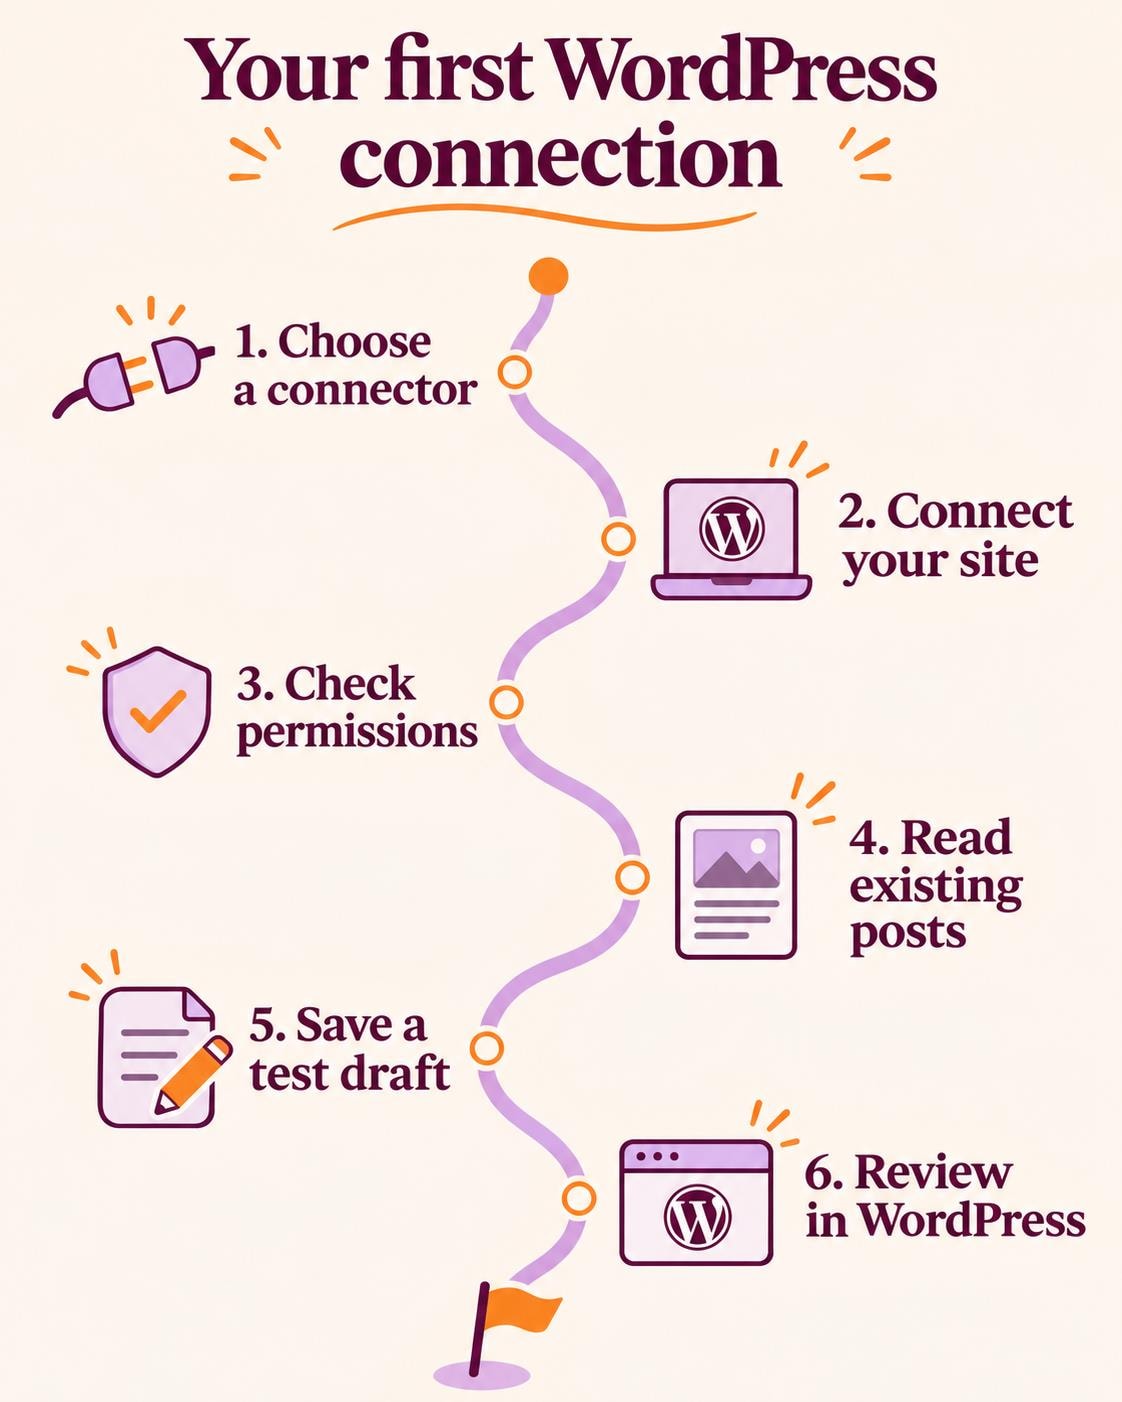
1. Set up the connector on your site
Follow your provider’s installation guide. If it requires a WordPress plugin, check the publisher, compatibility and installation instructions before activating it.
For the official WordPress MCP Adapter, the plugin instructions begin with Plugins > Add New, searching for MCP Adapter, installing it and activating it.
The adapter is a connection layer, not a complete AI writing tool. It also needs suitable WordPress abilities, which are actions registered by WordPress or another plugin. Only abilities marked for MCP exposure are reachable, and user permission checks still apply. Ask a developer for help if your required action is missing.
2. Add the connection in your AI app
Open your app’s area for connectors, integrations or MCP servers. The name varies between products.
- Select the supported WordPress integration, if the app lists one.
- For a custom MCP connection, copy the server address from your connector’s documentation or setup screen.
- Follow the provider’s supported sign-in process.
- Confirm the connection points to the correct site, especially if your account includes several websites.
Your homepage address is not necessarily the MCP server address. Do not guess the endpoint or copy one from an unrelated plugin.
3. Check the account and permissions
Use an account with the access your workflow needs. Reading posts, uploading images and publishing content can require different permissions.
Some integrations use WordPress Application Passwords. If your connector requires one, follow its instructions and create it from the appropriate WordPress user profile. Enter it only in the connector’s credential field, not in an article or chat message.
WordPress documents Application Passwords for authenticated REST API requests over HTTPS. They do not replace the user’s permission checks. See the official authentication guide for details.
Asking the AI not to publish is useful, but it is not a permission setting. Restrict publishing through the account or connector where that option exists.
4. Test reading before writing
Start with a request that does not change anything:
List the titles and links of my five latest published posts. Do not edit anything.
Compare the result with Posts > All Posts in WordPress. Check that the titles belong to the right site. If the app cannot list posts, resolve that problem before trying to create content.
5. Create one small test draft
Once reading works, try a short request:
Create a draft titled “Website Backup Checklist”. Write a short introduction and five bullet points. Use an existing relevant category. Do not publish it. Return the draft’s edit link.
Keep the first test small. Add SEO fields and image uploads only after you confirm that the connector supports them.
6. Review the result in WordPress
Open the saved draft and check:
- Status: it says Draft, not Published.
- Content: the text is accurate, useful and written in your voice.
- Formatting: headings, bullets and links display correctly.
- Categories and images: they match the topic.
- SEO fields: the title and description saved in the right place, if requested.
Check the preview on a small screen as well. Some connectors remove custom HTML styles, so a summary box or other design may need a final edit in WordPress.
Where APIs fit into AI integration
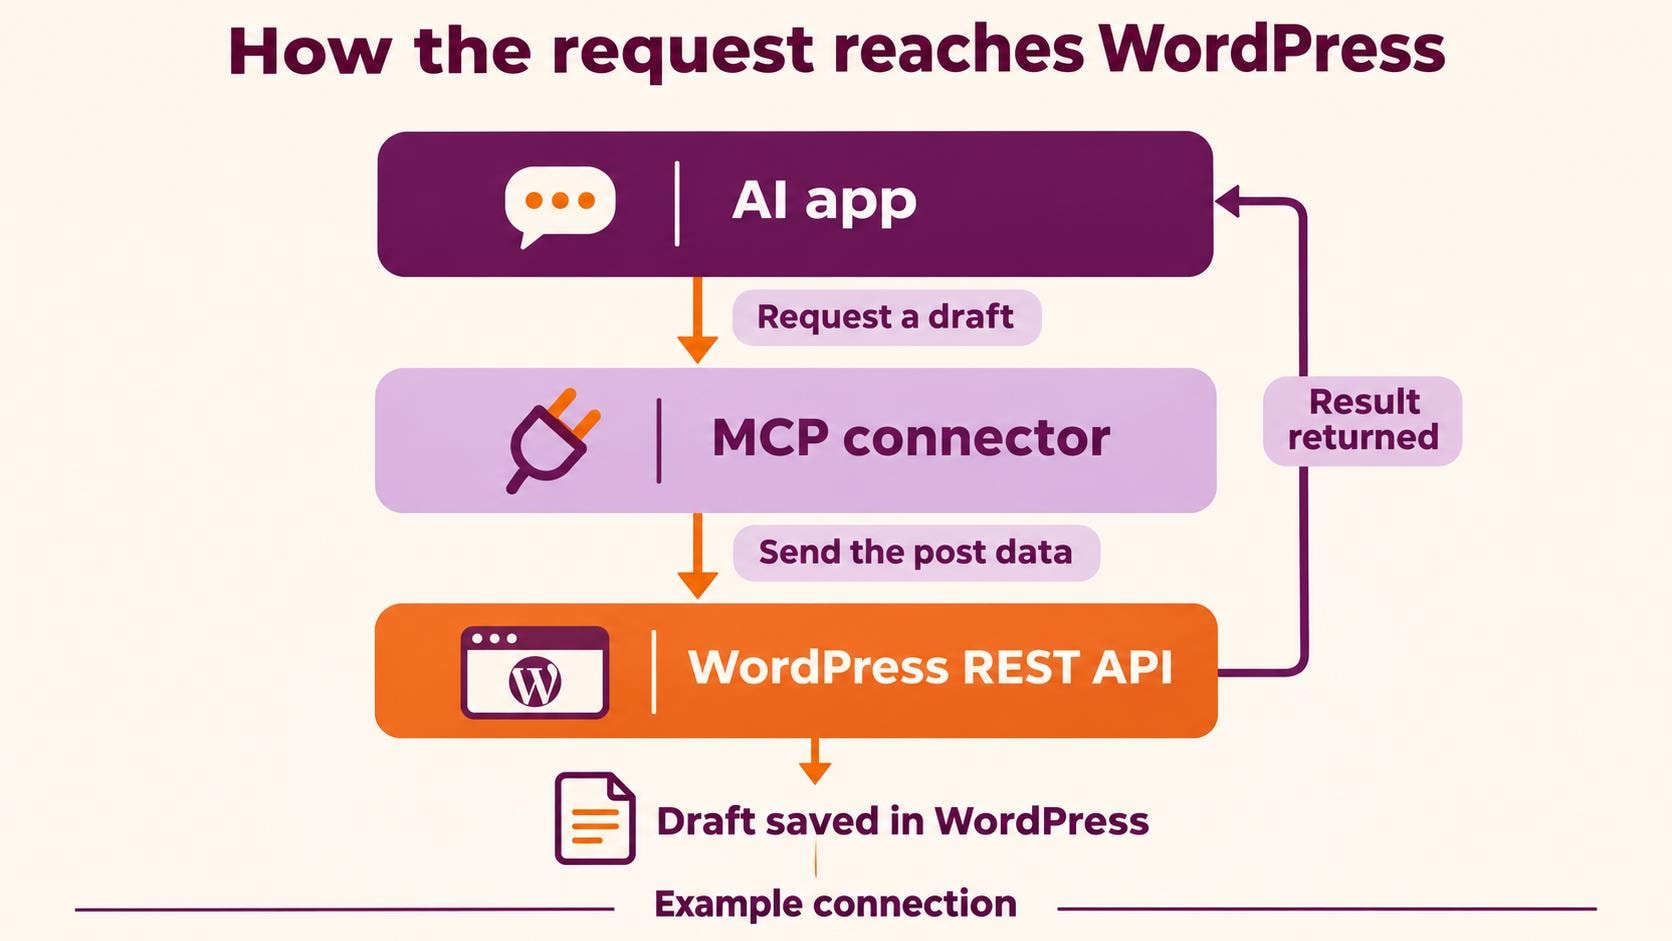
MCP and an API can work together. MCP gives an AI app a way to discover and call supported tools. A connector may then use the WordPress REST API to perform the requested action.
For example, the assistant requests a draft, the connector sends the data to WordPress, and WordPress saves it. The AI’s message alone is not proof that the save succeeded. Open the returned draft to confirm it.
Our MCP introduction includes a simple API comparison and a diagram of this process.
Problems when you connect AI to WordPress
| Problem | First check |
|---|---|
| The app cannot connect | Confirm the server address, HTTPS and the provider’s sign-in requirements. |
| Connected, but no useful tools appear | Check which actions or abilities the server exposes. A connection alone is not enough. |
| Posts can be read but drafts cannot be saved | Check for a draft-creation tool and the account’s editing permissions. |
| Images or SEO details are missing | Confirm that the connector supports those fields and that any upload completed. |
| A request times out | Check WordPress for the draft before retrying, so you do not create duplicates. |
If the error continues, keep the exact message and contact the connector provider or your developer. Do not disable security controls just to make a connection work.
Turn a working connection into a useful routine
After the first test, build a repeatable content workflow:
- You choose the topic and provide the audience and key points.
- The assistant checks related posts and prepares a draft.
- The connector saves supported fields in WordPress.
- You review and publish when the post is ready.
A connection does not automatically create a schedule. If you need a recurring workflow, choose an automation service that supports the trigger and actions you need.
For the next step, read Your First Personal AI Agent. For access controls, see our guide to AI agent security and tool permissions.
Frequently asked questions
Can I connect AI to WordPress without coding?
Yes, with a suitable ready-made integration. Custom actions or an MCP Adapter setup without the abilities you need may require a developer.
Will every AI connection add images and SEO details?
No. These are separate features. Check support for your SEO plugin, media uploads and featured images before choosing a connector.
Does connecting AI publish posts automatically?
Not by itself. Publishing depends on the exposed tools, account permissions and workflow. Start with draft creation and review the saved status.
Your first goal is one correct draft on the right site. Once you can repeat that reliably, add more tasks one at a time.